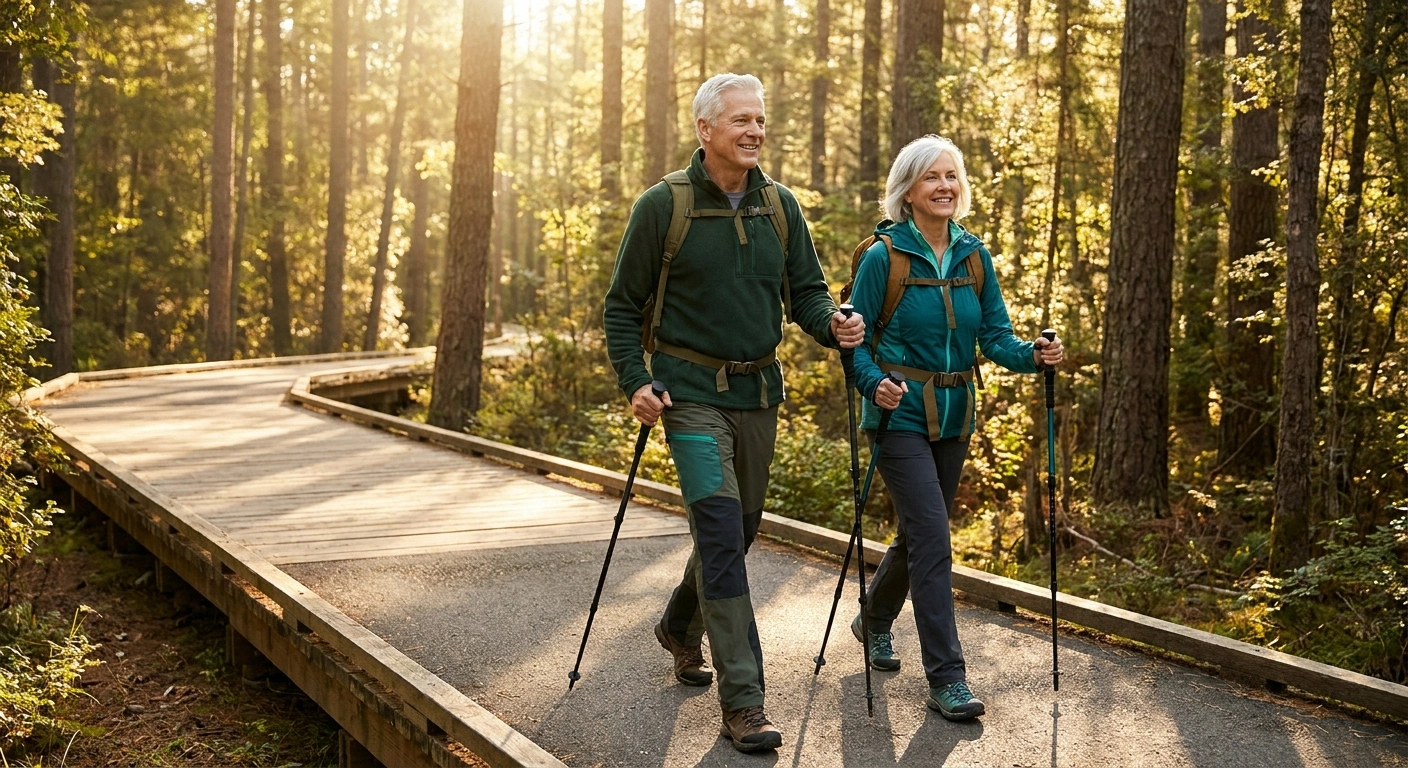
My husband and I took our grandkids to a state park last weekend. They wanted to hike. I wanted to hike. And for about ten minutes I just stood at the trailhead reading the sign — a 2.4 mile loop, “moderate,” with a 200-foot elevation gain — and tried to honestly answer whether I could do this with neuropathy in my feet.
I have hiked easy trails for years. But the more my feet have changed, the more I have learned that the answer to “can I hike this?” is almost never a simple yes or no. It is a calculation that involves the trail surface, the weather, the company, what's in my pack, what's on my feet, and whether I am willing to scale back to half the loop if my feet tell me to.
If you have neuropathy and you love being outside — or you want to start being outside again — you don't have to give up hiking. You do have to hike a little differently. Here is what I have learned from years of trying.
Why Hiking Is Worth Working For
Before we get to the cautions, let me say plainly: walking on a trail is one of the better things you can do for neuropathy, not one of the worse. Movement keeps small-vessel circulation going to your feet, which keeps oxygen flowing to the nerves that are still alive. Walking outdoors lowers stress, which lowers pain. Being in nature improves sleep, mood, and the sense that you are still a person who does things — all of which matter as much as the physical benefit.
The research on walking for diabetic neuropathy specifically is encouraging: regular moderate walking has been associated with slowed nerve damage progression and modestly improved symptoms over time. (For a deeper dive, see does walking help neuropathy.) Hiking adds the uneven terrain, the fresh air, and the psychological lift you can't get on a treadmill.
What you want to avoid is letting “I should be careful” turn into “I shouldn't go.” Most people with neuropathy can hike. They just need to think the trip through.
What Hiking With Neuropathy Actually Risks
Three things make trail walking different from walking your neighborhood:
1. Uneven, unpredictable surfaces. Rocks, roots, loose gravel, soft pine needles, sandy patches, narrow log bridges. Your feet need to react to each step. With neuropathy, the proprioception (the sense of where your feet are in space) is often impaired, and the small balance corrections you used to make without thinking now take more conscious effort or don't happen at all. The risk is ankle rolls, trips, and falls — which can be more serious in remote settings.
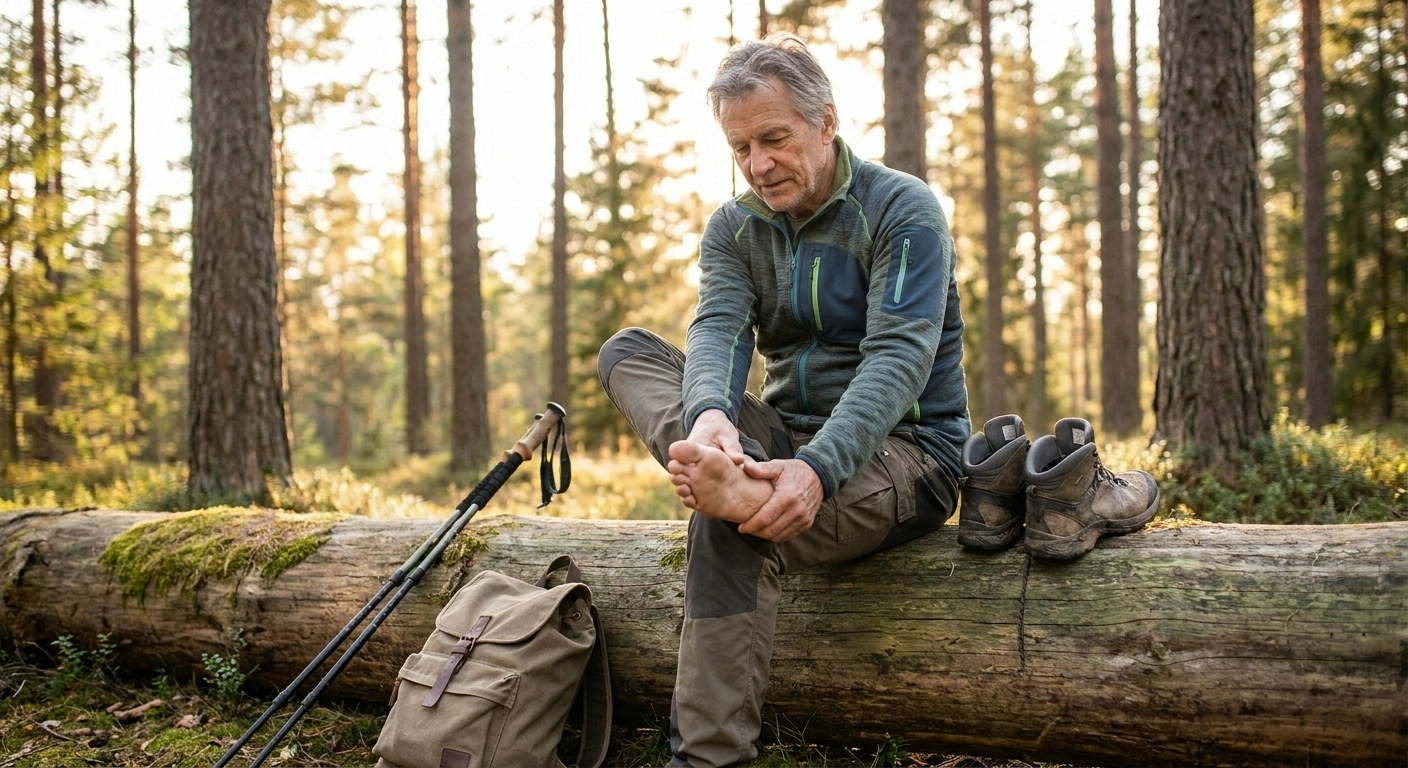
2. Foot injuries you don't feel. A small blister, a hot spot from a wrinkled sock, a pebble in the boot, a rubbed heel — for someone with intact sensation, these announce themselves immediately and get fixed. For someone with neuropathy, they often go unnoticed until they've turned into a real wound. By the end of a hike, you can find a half-dollar-sized blister you had no idea was forming.
3. Distance from help. A neighborhood walk lets you turn around at any time. A trail commitment is bigger. If your feet flare up at the 3-mile mark of a 6-mile loop, you still need to walk 3 more miles back. If you fall, help can be hours away.
None of these are reasons not to hike. They are reasons to plan.
Choosing the Right Trail
The single biggest variable is the trail itself. Not all hikes are created equal, and the parks have a lot of options that don't get advertised as the “main” trail.
Things I look for:
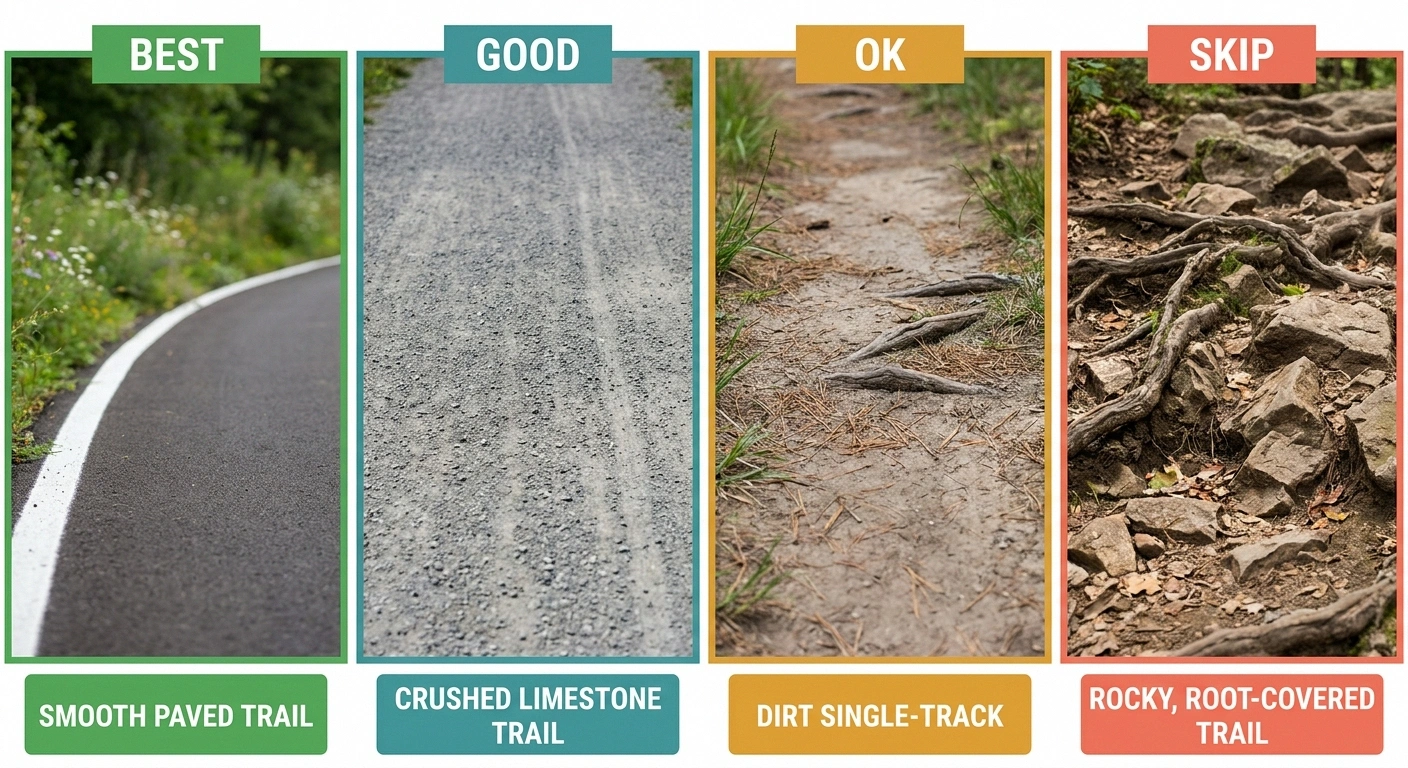
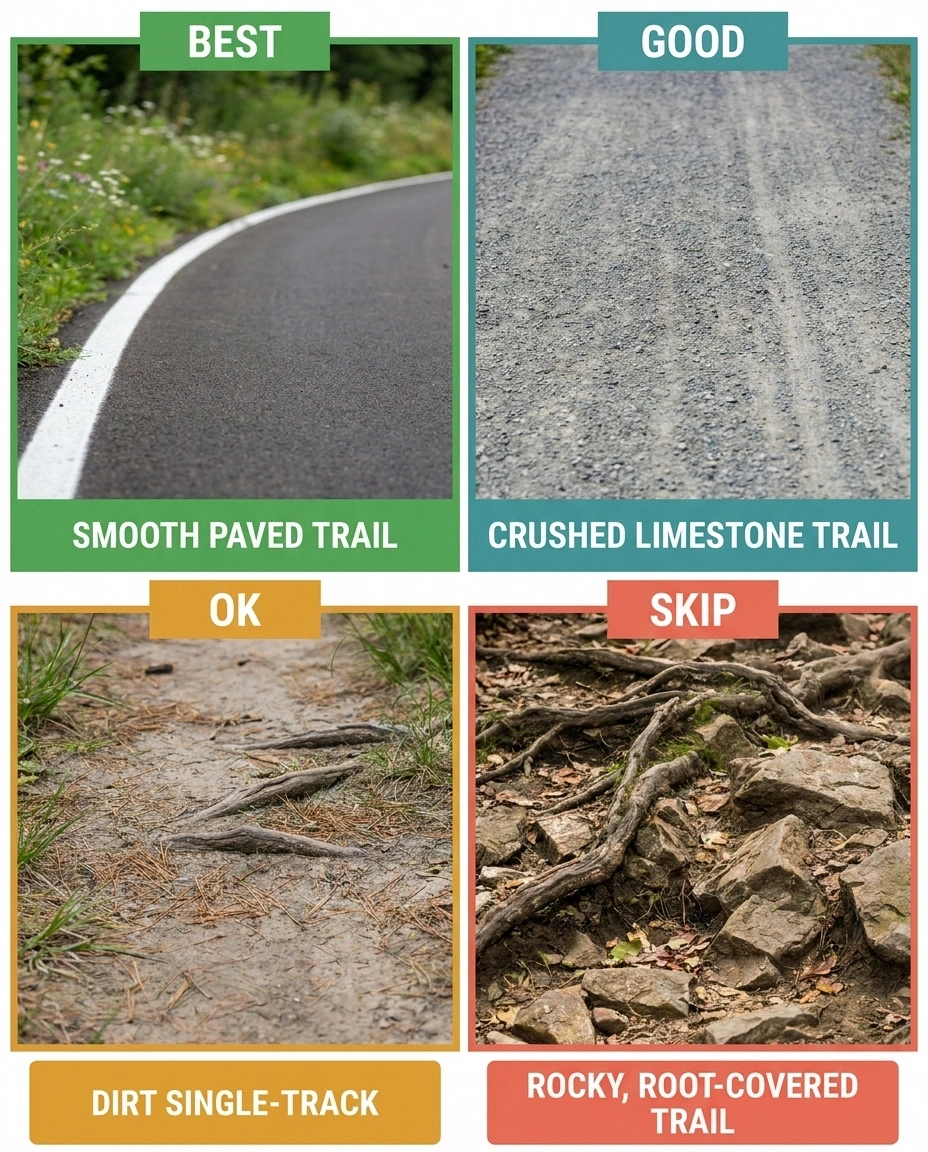
Surface type. Paved or boardwalk trails are the gold standard for neuropathy. Many state parks, national parks, and nature preserves have ADA-accessible paved loops that wind through real scenery. Crushed limestone or hard-packed dirt trails come next — predictable underfoot, low ankle-roll risk. Avoid: rocky, root-strewn, loose-gravel, scrambling-required trails, especially when you're new to hiking with neuropathy.
Elevation gain. Look at the elevation profile, not just the total distance. A flat 4-mile trail is far easier on your feet than a hilly 2-mile trail. Steep descents are especially hard with neuropathy because you can't feel your feet planting and your toes get crunched into the front of the boot.
Distance options. Pick trails with shorter loop options or out-and-back trails where you can turn around at any point. A 1-mile loop you can hike 1-3 times is better than a 3-mile loop you have to complete or bail on.
Cell signal. If you're going into a remote area, check that you'll have a phone signal at least at the trailhead. Many parks now publish maps showing cell coverage. AllTrails reviews often mention signal quality.
Trail traffic. A popular trail with other hikers is safer than a quiet one. If something goes wrong, help is closer. For a first hike back, busy is better.
The AllTrails app, the National Park Service website, and most state park websites publish trail difficulty ratings, elevation profiles, and surface descriptions. Read them carefully. The phrase “moderate with rocky sections” should be a yellow flag for new neuropathy hikers — pick “easy paved” or “easy with crushed gravel” instead.
The Footwear Question
This is where many neuropathy hikers get tripped up — literally. The wrong boot will produce blisters you can't feel and stiff ankle support you don't actually need. The right footwear matches the trail.
For easy paved or hard-packed trails, your best walking shoes are usually fine — the same supportive, cushioned shoes you wear on a long neighborhood walk. Many neuropathy patients do well in trail-runner shoes, which are lighter than boots, flexible, and have grippy soles. (For more on shoe selection generally, see best shoes for neuropathy.)
For more uneven trails, a low-cut hiking shoe with a rock plate (a stiff layer in the sole that protects from rocks underfoot) and good grip is the sweet spot. Stiffer boots offer ankle support, but that support is mostly irrelevant if you can't feel your foot rolling — what you actually need is a stable platform and good lugs for grip.
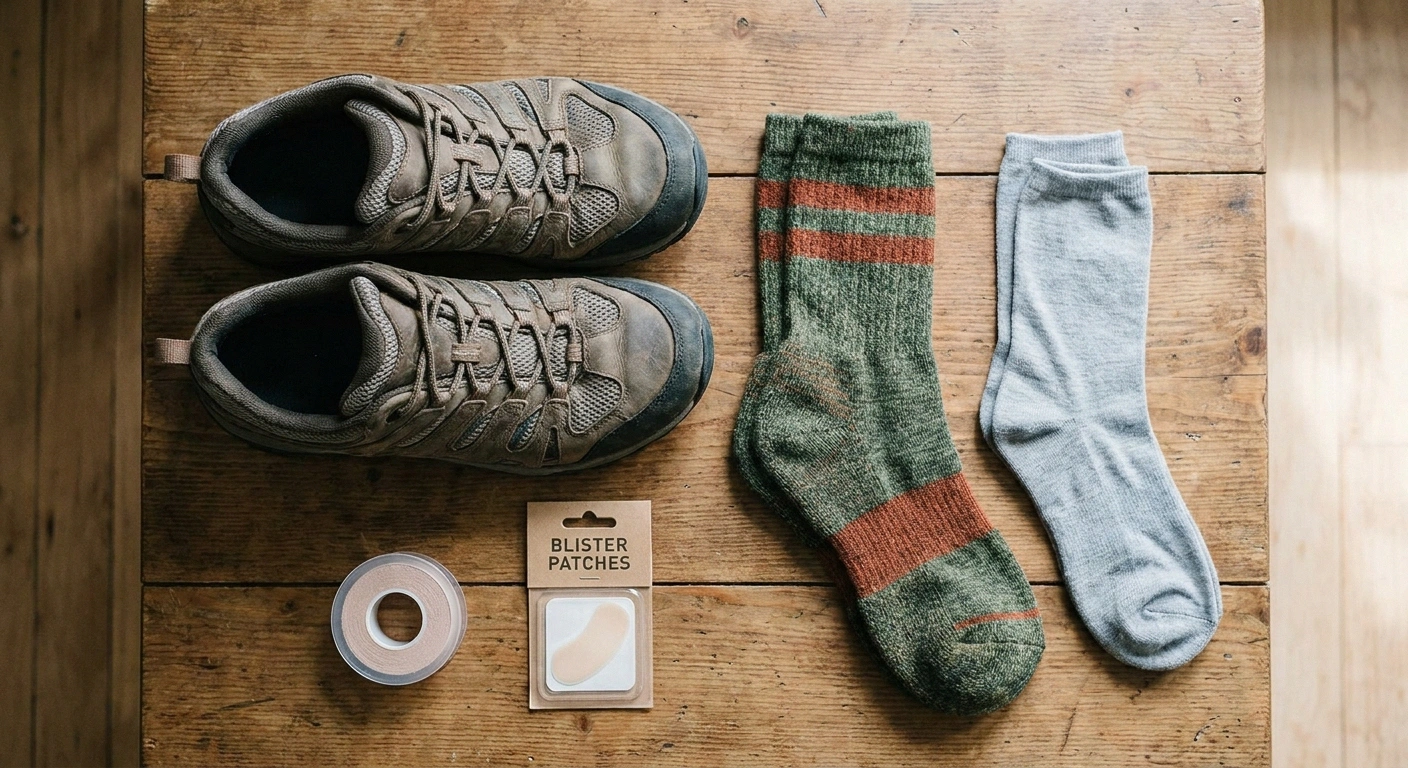
Critical regardless of style:
Sized for swelling. Hike-day feet are bigger than morning feet. Most experienced hikers size up a half size from their street shoe. For neuropathy, where swelling can be more pronounced and pressure points have outsized consequences, a half size up is non-negotiable. Try the boots on at the end of the day, wearing the socks you'd hike in.
Broken in. Never hike a long trail in new boots. Wear them for short walks for at least two weeks first. Check for hot spots after each break-in walk by looking at the skin.
Wool or synthetic socks, never cotton. Cotton holds moisture, which softens skin, which blisters. Merino wool or synthetic hiking socks wick moisture away. Some hikers swear by sock liners (a thin sock under the wool sock) for extra blister prevention. For neuropathy specifically, seamless or low-seam socks reduce the pressure-point risk.
Closed-toe always. Never hike in sandals or open shoes with neuropathy, even on easy trails. A rock kick or a stub against a root that you can't feel can produce a real injury.
What Goes in Your Pack
The day-pack for neuropathy hiking is similar to a normal hiking pack with a few additions:
- Water. More than you think — dehydration worsens neuropathy symptoms and increases fall risk. A liter for short hikes, two for longer. A hydration bladder makes drinking effortless.
- Snacks with protein. Trail mix, jerky, cheese, a peanut-butter sandwich. Blood sugar dips can amplify nerve symptoms.
- Phone, fully charged, with a downloaded trail map. AllTrails Plus and Google Maps both support offline maps. Cell signal can drop without warning.
- A whistle. If you fall in a remote spot, three whistle blasts carry far further than your voice.
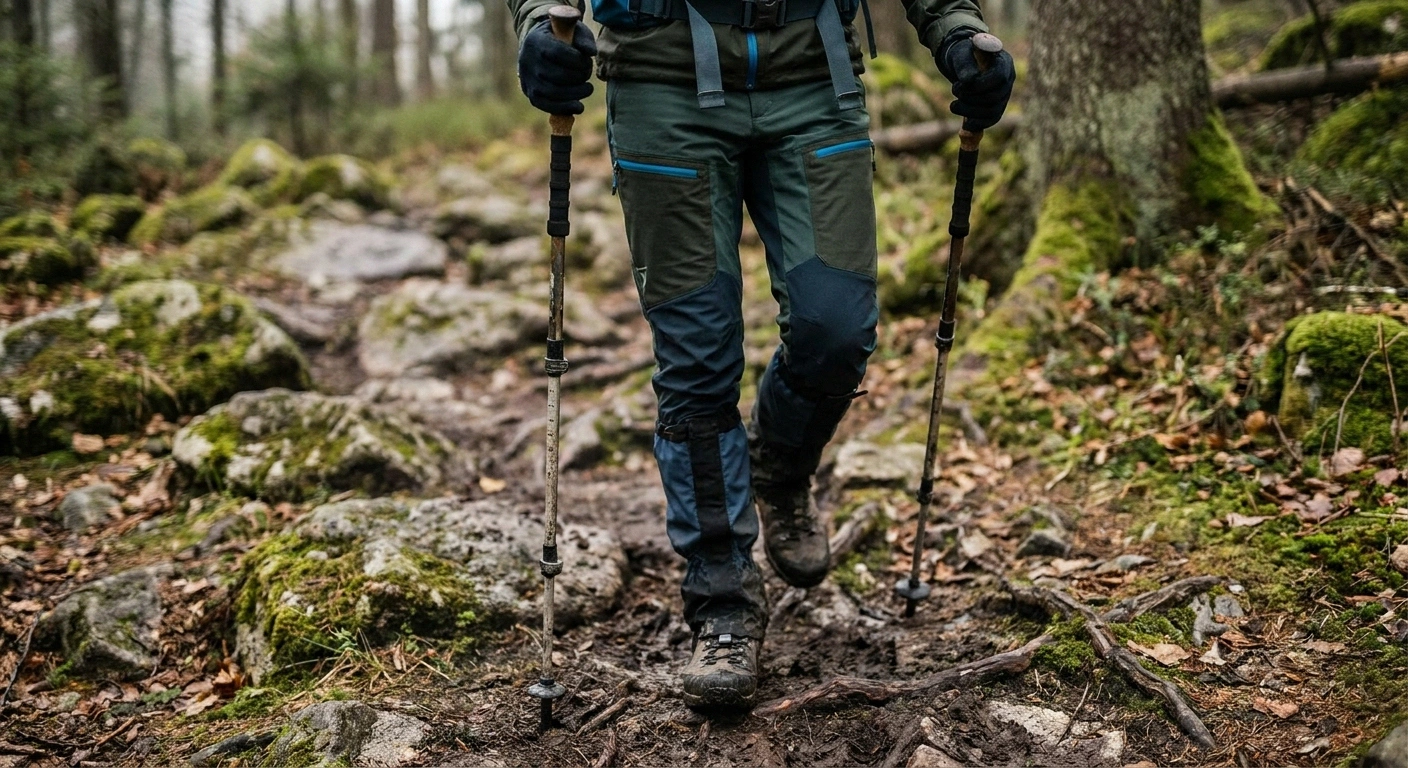
- Trekking poles. Even if you don't use them on flat sections, they earn their keep on hills and uneven sections. Pole use can reduce knee load by 25% on descents and dramatically improves balance — particularly valuable when your feet aren't sending normal signals. (More in balance and fall prevention.)
- Blister-prevention supplies. Moleskin, blister-specific bandages (like Compeed), a small pair of scissors or a multi-tool, athletic tape. Address hot spots at the first rest stop, before they become blisters.
- A small first-aid kit. Bandages, antiseptic wipes, gauze, painkillers, any rescue medications you need.
- Sun protection. Hat, sunglasses, sunscreen. Especially important if your medications make you photosensitive.
- A light layer. Even on a warm day, weather changes, and a fleece in the pack is cheap insurance.
- ID and emergency contact info. Driver's license and a small card listing your conditions, medications, and someone to call. If you become unresponsive, this matters.
The Body-Care Routine, Before and After
The single biggest mistake neuropathy hikers make is skipping the foot-care routine on either side of the hike. The hike itself is half the day. The other half is preparation and inspection.
Before:
- Check your feet visually for any existing hot spots, cracks, or blisters from previous activity. If you have a wound, you don't hike.
- Trim toenails straight across so they don't dig into adjacent toes on descents.
- Moisturize feet the night before (not the morning of — too slippery in socks).
- Put on clean, dry, well-fitted socks. Smooth out wrinkles.
- Lace boots snugly through the foot section, looser at the ankle for flat trails, tighter at the ankle for hills.
- Eat something with protein. Drink a glass of water.
During — every rest stop:
- Sit down. Drink water. Eat a small snack.
- If feet feel “off” in any way, take the boots off and look. Hot spots are easy to fix while they are still red, hard to fix once they have blistered.
- If you find a hot spot, cover it with moleskin or a blister patch before continuing.
- Pay attention to the conversation in your body. Tightness in calves? Cramping? Headache? Light-headed? Slow down or turn around.
After:
- The moment you get back to the car, change into dry socks and comfortable shoes.
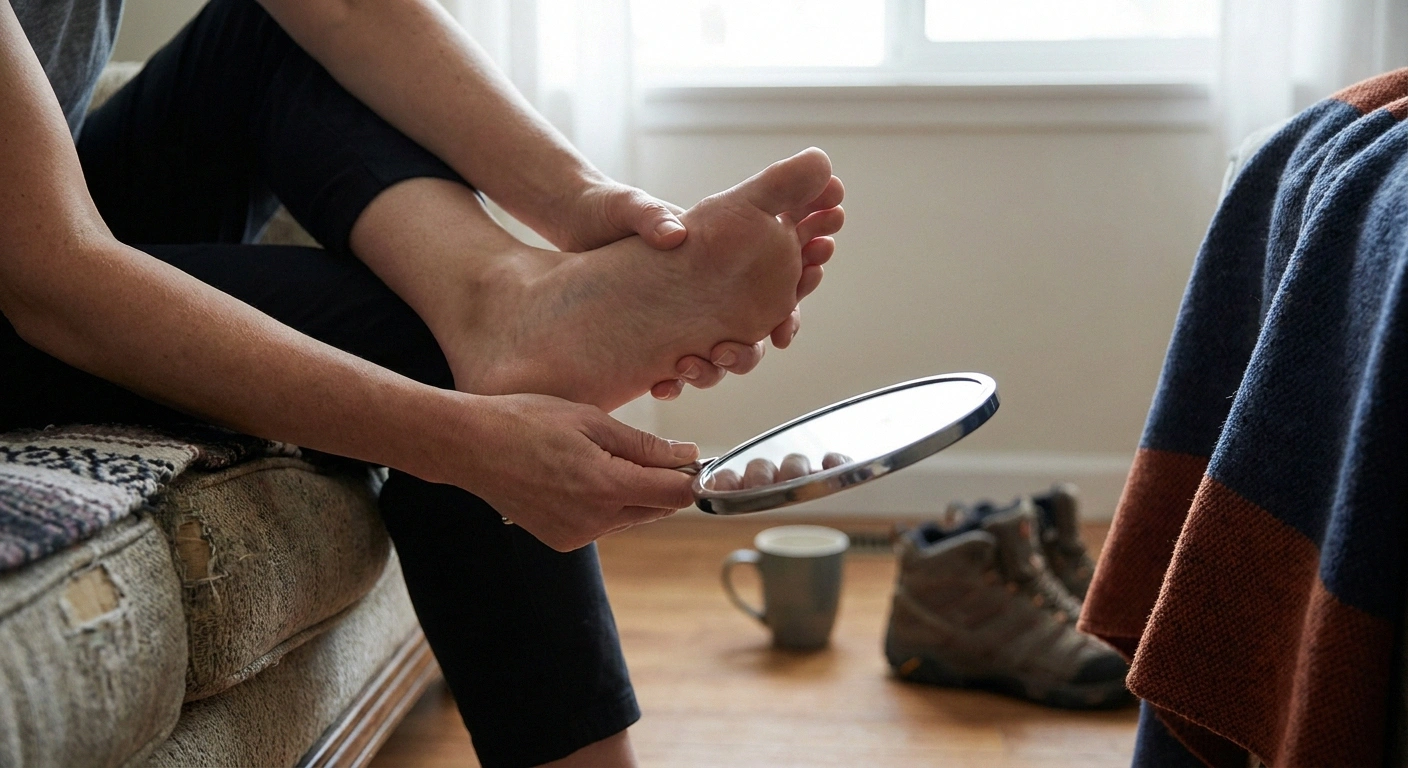
- At home, do a full foot inspection — top, bottom, between toes, around heels. Use a mirror or have a partner help with the bottoms. (More on this routine in neuropathy foot care.)
- Wash feet. Dry thoroughly, especially between toes.
- Treat any blisters or hot spots before bed.
- Hydrate and eat a real meal.
- If anything looks concerning — a wound, a deep blister, a hot/red area suggesting infection — don't wait. Call your doctor.
Hiking Smart, Not Hiking Hard
A few habits separate the people who hike successfully with neuropathy from the people who get hurt or burnt out:
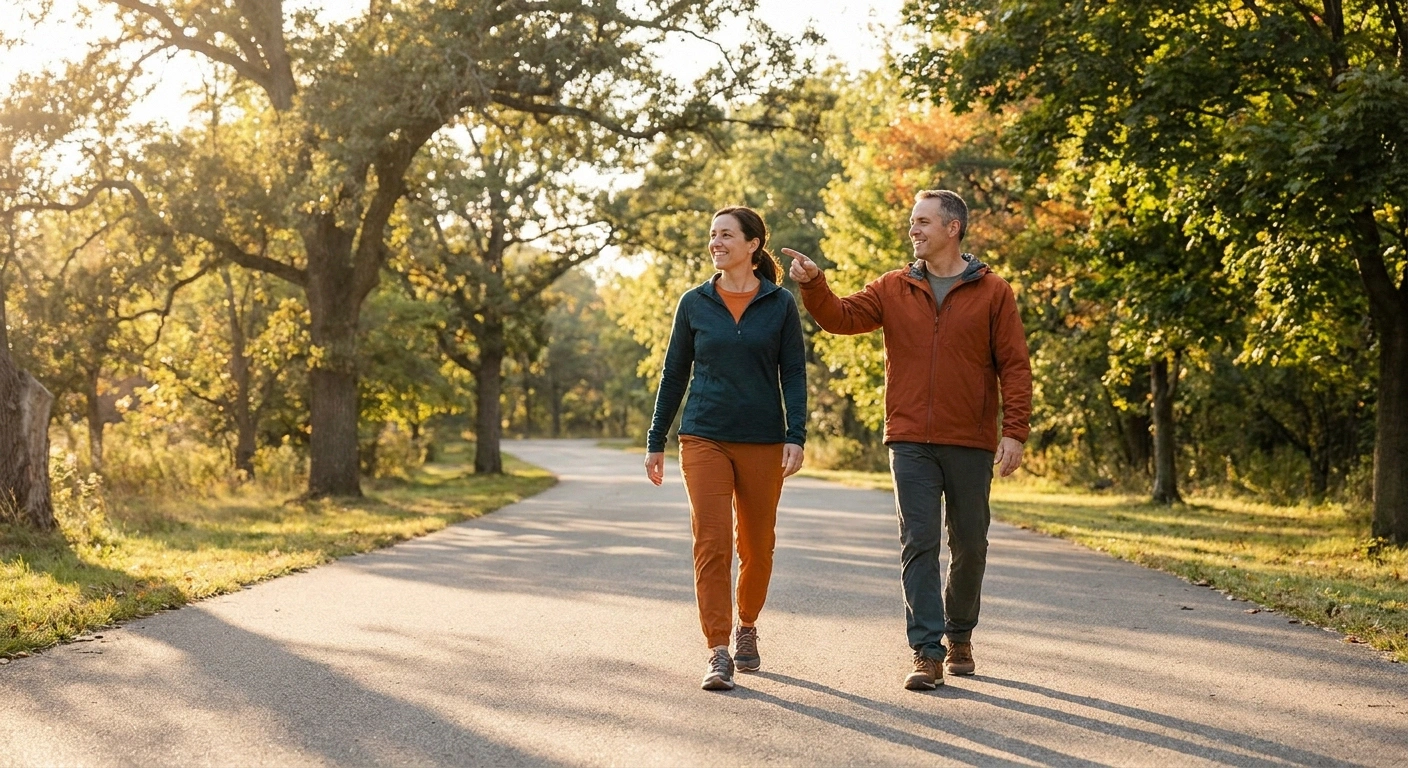
Go with someone. Especially when you're learning what your hiking limits look like. A partner can spot trail hazards, help you back up if you stumble, and get help if something goes wrong. If you must hike alone, tell someone exactly where you're going and when you'll be back.
Pace yourself. The trail is not a race. Slower walking gives your feet time to send what signals they can and gives your balance system time to react. The goal is to finish the hike feeling like you could have done a little more, not collapsed at the trailhead.
Plan exit points. Before you start, identify the spots on the trail where you can turn around. A loop with a halfway-point cutoff trail is gold. Know your bailout options.
Hike in the best weather. Cool, dry mornings are easier than hot afternoons. Wet trails are slippery — and the trip-and-fall risk multiplies. Avoid hiking right after rain unless the trail is on hard surface.
Build up. Your first hike after a long break should be shorter than you think you can handle. A 1-mile loop on a paved trail. The next time, 1.5 miles. The time after that, 2. Your feet will tell you what they can do — but slowly, not all at once. Pushing for a big hike on day one is how people end up with blisters and weeks of rest.
Stop early when it's wrong. The wisest thing I learned from years of hiking with changing feet is this: turning around at mile 1.5 when something feels off is not failure. It is success. The failure mode is pushing through and ending up unable to walk for a week.
What to Do If Things Go Sideways
Even with planning, things can go wrong. A few quick-reference rules:
Foot suddenly worse: Stop. Sit. Remove boot. Look. Fix what's fixable; turn around if not.
Dizzy or light-headed: Sit, drink, eat. Wait. Re-assess before continuing.
Trail harder than expected: Trust your eyes over your ambition. Turn around.
If you fall: Stay still for a minute and assess. Wiggle toes and fingers. Check for blood. Sit up slowly. Once you know what hurts, decide if you can walk. If you can, walk slowly back the way you came with the trekking poles taking more weight. If you can't, blow the whistle, call 911 if you have signal, or send your companion for help while you stay put.
If a foot suddenly hurts a lot worse than usual: Stop. Sit down. Remove the boot and sock. Look. A pebble, a wrinkled sock, a forming blister — these are fixable on the trail. A wound is a turn-around moment.
If you feel light-headed, dizzy, or unusually tired: Stop, sit, drink, eat. Dehydration and blood sugar dips look exactly like this. Wait until you feel solid, then decide whether to continue or turn back.
If the trail looks different than the map says: Trust the map and the published descriptions. If you find yourself on a section that's more rugged than expected, turn around. Many serious hiking injuries happen when people press on past where they should have turned back.
The Hike My Husband and I Picked
For the state-park weekend, I stood at the trailhead, read the sign, and made a different call than the original plan. Instead of the 2.4 mile “moderate” loop with the rocky section, we picked the 1.1 mile paved nature loop on the other side of the park. The grandkids didn't care which loop — they cared that we were outside, that we found a snake on the path, and that we stopped at the small overlook for a snack.
I came home with feet that felt good, not punished. We made the bigger loop a goal for next time — after I get more miles under me on the paved one.
That's hiking with neuropathy in one sentence: not every trail, not every day, not every speed. But a lot of trails, on a lot of days, at a slower speed, with a smarter pack and better feet. That is more than enough.
Frequently Asked Questions
Is hiking actually safe with peripheral neuropathy?
Hiking can be safe and beneficial with neuropathy when you choose the right trail, wear the right footwear, and plan for the things your feet might not feel (blisters, hot spots, pebbles in the boot). It is not safe to hike rugged or remote trails alone, in poor footwear, or without inspecting your feet before and after. The risk is real but very manageable with the planning steps in this article.
What trail surface is best for hiking with neuropathy?
Paved trails and boardwalks are the easiest on your feet and offer the most predictable footing. Crushed limestone and hard-packed dirt come next. Avoid rocky, root-strewn, or loose-gravel trails — especially when you are new to hiking with neuropathy — because uneven surfaces require fast balance reactions that may not happen as quickly with impaired proprioception.
Do I need hiking boots, or are walking shoes okay?
For easy paved or hard-packed trails, your best walking shoes are usually fine. For uneven trails, a low-cut hiking shoe with a rock plate and good lug pattern is better than a heavy boot — it gives you protection and grip without unnecessary stiffness. Heavy ankle-support boots are mostly relevant for off-trail or rugged terrain that most neuropathy hikers should skip anyway. Whatever you choose, size up a half size, wear wool or synthetic socks (never cotton), and break the shoes in before any long hike.
How far should my first hike be?
If you have not been hiking regularly, start with a 1-mile loop on a paved trail. Add half a mile per outing as your feet tell you they can handle it. There is no rush. People who try a 3-mile “moderate” trail as their first hike back often end up with blisters or flare-ups that set them back weeks. Building up slowly produces a much better long-term result.
Why are trekking poles important for hiking with neuropathy?
Trekking poles act as two extra points of contact with the ground. They reduce knee load on descents by about 25 percent, provide huge stability improvement on uneven sections, and give your balance system the proprioceptive feedback your feet may not be providing reliably. For people with reduced sensation in the feet, poles are not just helpful — they are one of the highest-value pieces of equipment you can carry.
Should I hike alone?
Hiking with at least one companion is strongly recommended, especially when you are still learning what your hiking capacity looks like with neuropathy. If you must hike alone, choose a short, well-trafficked, paved trail near a parking area, tell someone exactly where you are going and when you will be back, and carry a fully charged phone and a whistle. Save the longer or more remote hikes for when you have company.
What should I do about a blister I discover after the hike?
Small blisters that are intact: leave them alone, cover with a hydrocolloid blister patch (Compeed or similar), and let them resolve. Larger blisters or ones in a high-friction area: clean the skin with mild soap and water, sterilize a small needle with rubbing alcohol, puncture the edge of the blister to drain the fluid, leave the skin in place as a natural bandage, apply antibiotic ointment, and cover with a blister patch or bandage. Any blister that becomes red, hot, swollen, or pus-filled needs medical attention promptly. For neuropathy patients, never delay on a foot wound — small problems become big problems fast.
How can I tell if my feet are flaring up because of the hike or because of something more serious?
Typical post-hike flare: increased burning, tingling, or fatigue in feet that resolves with rest, ice, elevation, and a normal night's sleep. Something more concerning: a new area of pain, redness, warmth, or swelling; a wound or blister you didn't notice; sudden severe pain disproportionate to the activity; or systemic symptoms like fever. The concerning patterns warrant a same-day call to your doctor. Routine post-activity flare-ups are normal and manageable; injuries are not.