A physical therapist once told me something about nerve gliding that reorganized how I thought about it, and it took about nine words: you are not stretching the nerve, you are moving it.
That distinction sounds like hair-splitting until you understand what it rules out. Stretching implies pulling something to its end range and holding it there. Nerves hate that. They aren’t muscles and they don’t respond to being held taut. What they respond to is sliding, the way a cable slides inside its housing when you squeeze a bike brake.
Nerve gliding, also called nerve flossing or neural mobilization, is a set of slow paired movements designed to make a nerve travel through the tunnel it lives in. Done correctly it’s gentle, boring to watch, and genuinely useful for a certain kind of nerve problem. Done badly — too fast, too far, held too long — it’s a quick way to make an irritable nerve angrier for two days.
The rest of this is the how. It starts with the harder question, though, which is whether the technique even addresses the thing you’ve got.
What Gliding Actually Does to a Nerve
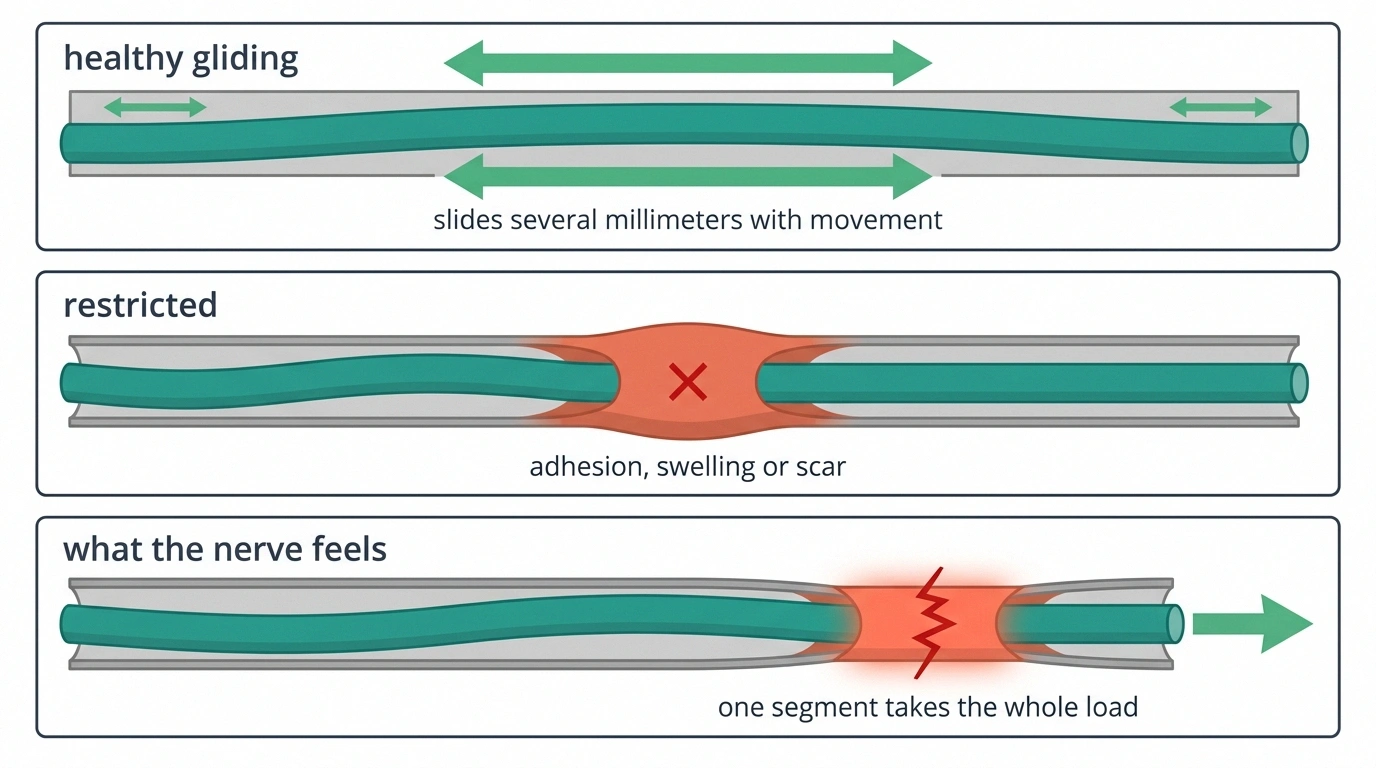
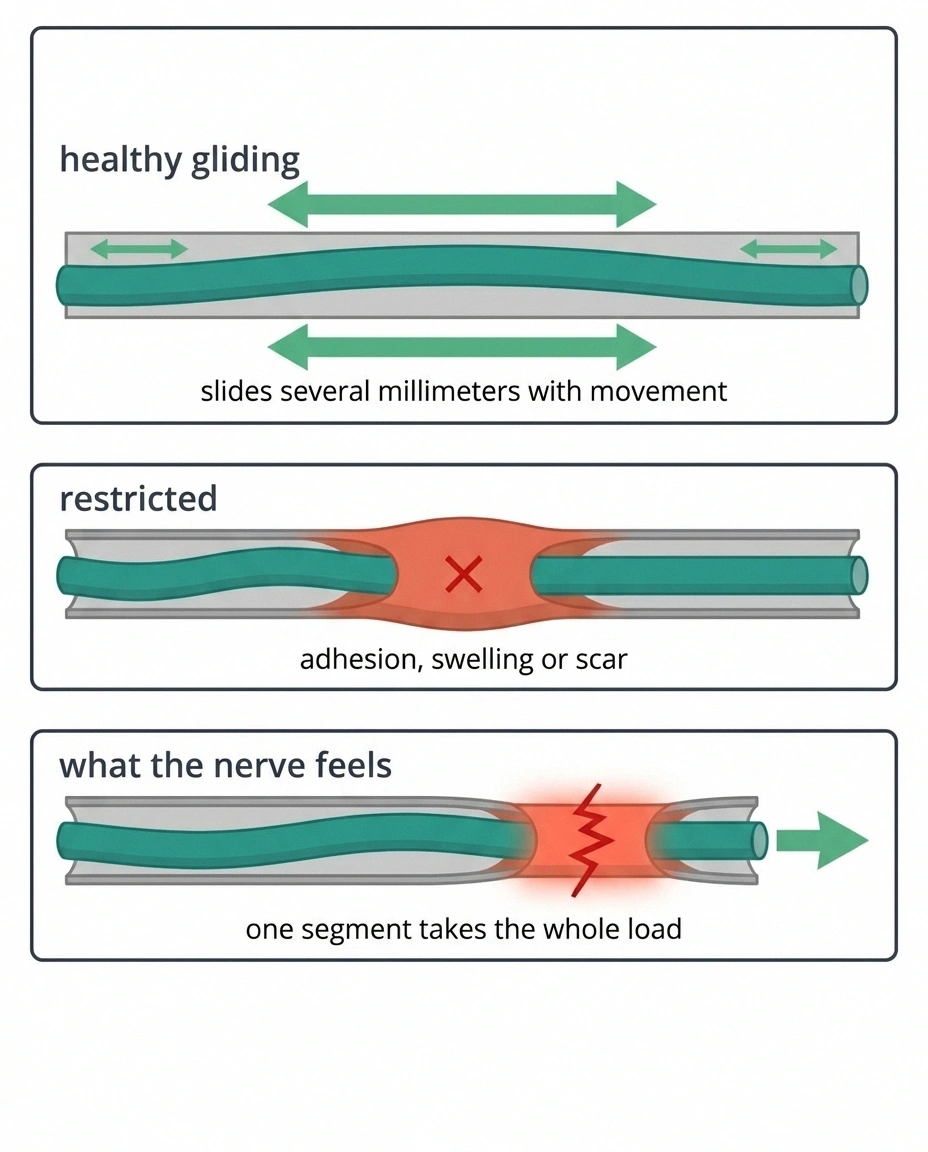
Picture a nerve running from your low back down the length of your leg. It isn’t anchored in place. As you move, it slides through the tissue around it — a few millimeters here, more than a centimeter there — adjusting constantly so no single segment takes all the tension of a movement.
That mobility can be lost. Scar tissue after surgery, swelling in a narrow tunnel, thickened tissue around a joint, or years of an inflamed compression point can all make a nerve stick where it used to slide. When it sticks, movement that should distribute tension across the whole length instead loads one short segment. The nerve reports this the only way it knows how — tingling, burning, a zip of electricity down the limb.
Gliding works on that specific failure. The theory across most clinical sources is a combination of three effects: restoring the nerve’s excursion through its pathway, improving circulation to a compressed segment, and helping the fluid inside the nerve move along rather than pool. You’re restoring a mechanical property, essentially, and the payoff is that the nerve stops getting tugged every time you move.
Which brings up the part that matters and gets skipped: this is a mechanical fix for a mechanical problem. If a nerve is being damaged by high blood sugar, chemotherapy, a vitamin deficiency or an autoimmune attack, its problem isn’t that it has stopped sliding. Gliding won’t repair a fiber that metabolic injury is busy dismantling.
The Honest Scope Question
The research on nerve gliding lives almost entirely in entrapment conditions. Sciatica has the best support, where the technique is considered safe and shown to improve pain and disability. Carpal tunnel syndrome and cervical radiculopathy have a reasonable body of work behind them too.
What does not exist is a strong trial showing that nerve gliding reverses length-dependent polyneuropathy — the stocking-and-glove pattern that starts in the toes and creeps upward, the kind driven by diabetes or chemotherapy or idiopathic causes. I’ve looked, repeatedly, because I’d love to report otherwise. The evidence isn’t there.
So why would anyone with polyneuropathy bother?
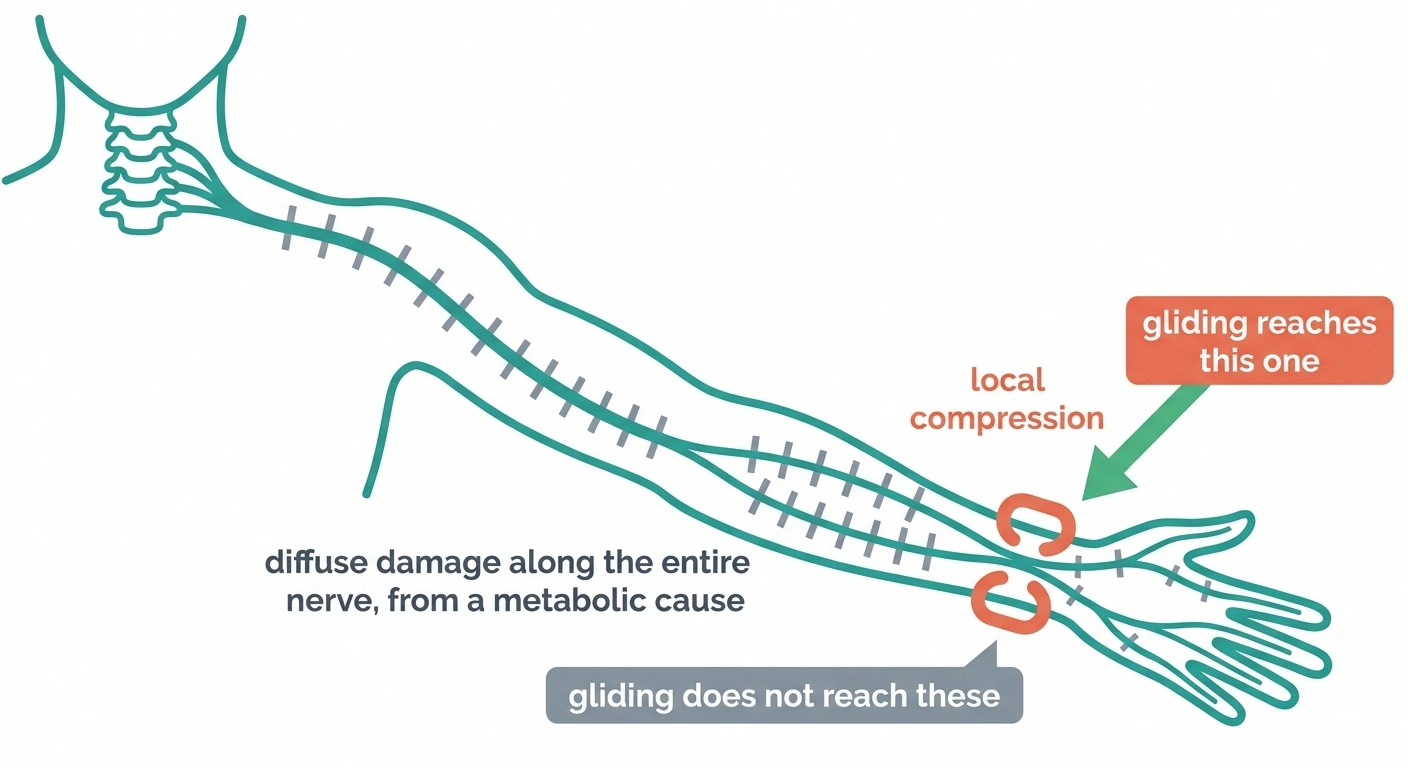
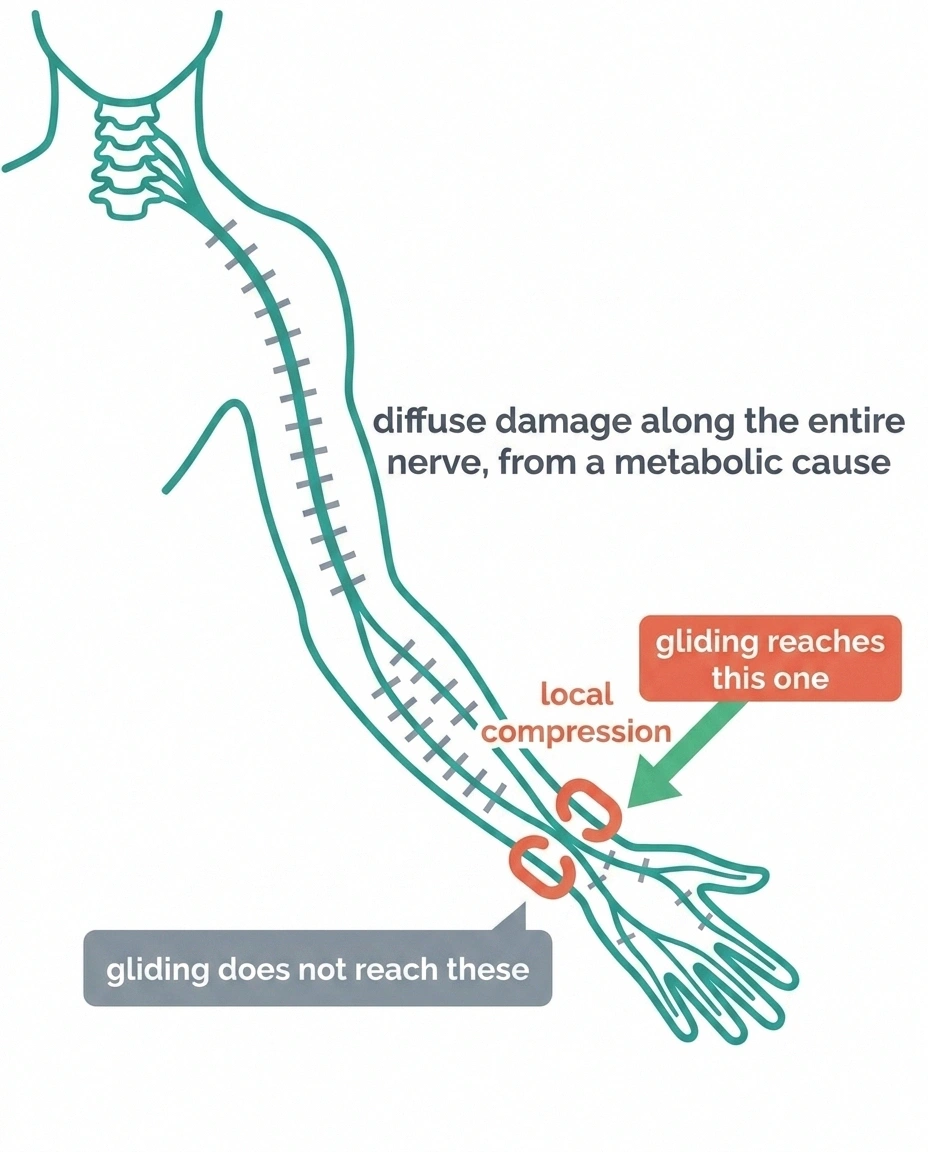
Because a great many people have both. Nerves already stressed by a metabolic condition tolerate compression badly, and studies of type 2 diabetes find meaningful sensory involvement of the median and ulnar nerves in the arm, not just the classic foot pattern. Clinicians call the overlap a double crush: a nerve compromised diffusely along its length becomes far more symptomatic when a second, local squeeze is added somewhere on that path.
Which means a person with diabetic neuropathy can absolutely also have a compressed median nerve at the wrist, and the compressed portion is the part gliding can reach. If some fraction of your hand symptoms comes from that wrist, gliding may take that fraction away. It won’t touch the rest. Sorting out which is which is exactly what the carpal tunnel versus peripheral neuropathy distinction is about, and the same logic applies in the leg, where sciatica and neuropathy produce overlapping but distinguishable patterns.
Good candidates: symptoms following one nerve’s territory, symptoms that change clearly with limb position, a history of an entrapment diagnosis, post-surgical scarring along a nerve path, or a diffuse neuropathy with one limb noticeably worse than its twin.
Poor candidates: perfectly symmetrical burning in both feet with no positional component, active severe inflammation, and any new weakness or fast-worsening numbness — that last one needs evaluation before it needs exercise.
Sliders Before Tensioners

Nerve gliding comes in two flavors, and starting with the wrong one is the most common reason people decide the technique doesn’t work for them.
If you cannot tell which one you performed, check the far joint. A slider always releases something while the other end loads.
| Slider | Tensioner | |
|---|---|---|
| Ends of the nerve | One loads, one releases | Both load together |
| Nerve travel | High | High |
| Tension on the nerve | Low | High |
| Flare risk | Low | Meaningful |
| When to use | Weeks 1 and 2, and indefinitely if symptoms are irritable | Only after sliders are tolerated without next-day symptoms |
Sliders load the nerve at one end while unloading it at the other. As one joint increases tension, another releases it, so the nerve travels a long distance without ever being pulled tight. Ultrasound imaging studies of the median nerve confirm the point directly: different gliding variants produce measurably different amounts of nerve excursion, and the sliding variants produce good travel at low tension.
Tensioners load both ends at once. More stress, more excursion, more risk of a flare. They’ve got a place later on, in a nerve that has already proven it tolerates sliding.
Start with sliders. Stay there for at least two weeks. If you never progress past them, you’ve still gotten most of the available benefit. Irritable nerves in particular often do better on a permanent diet of sliders alone.
The Lower Limb Sequence
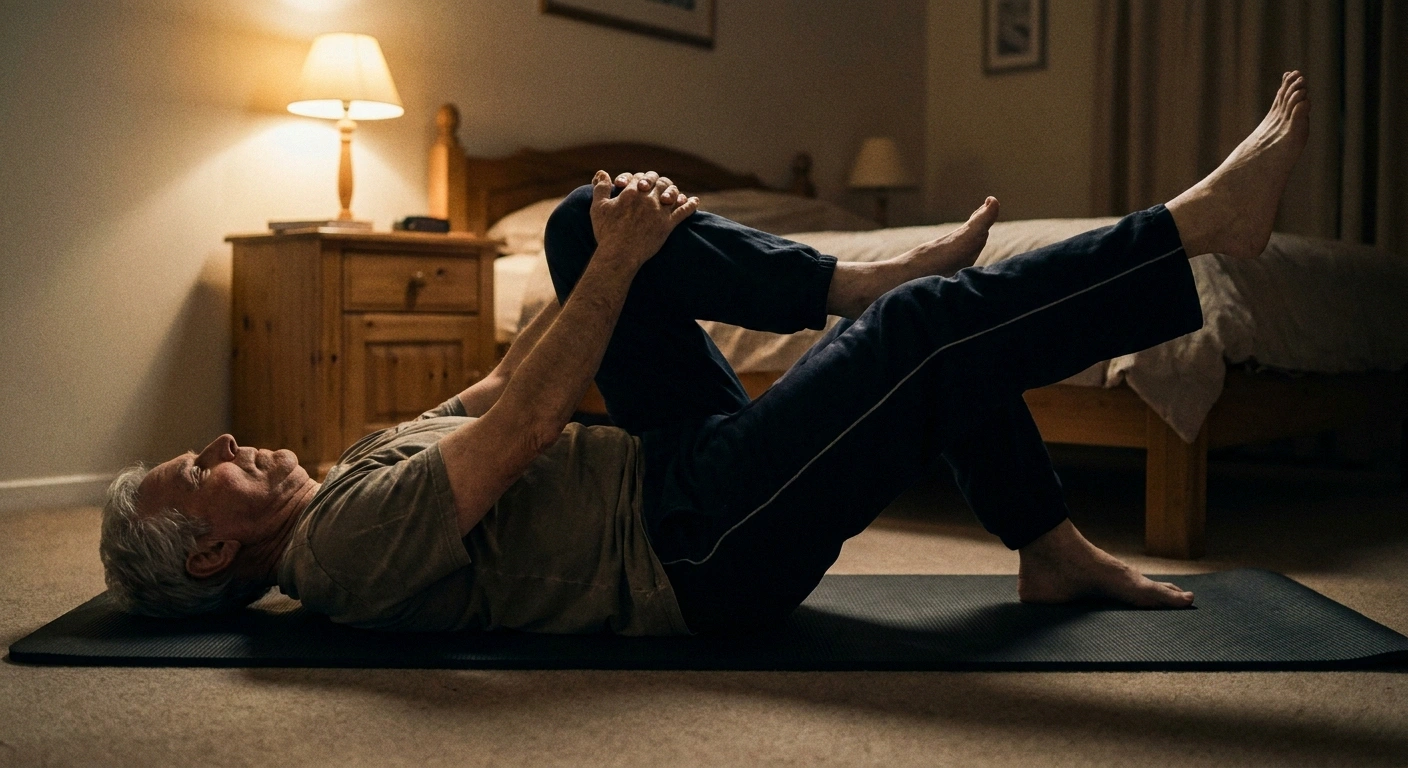
For sciatic distribution symptoms: buttock, back of thigh, calf, sometimes into the foot.
Seated sciatic slider. Sit tall in a firm chair, both feet flat, hands resting on your thighs. Now pair two movements that oppose each other. As you straighten one knee out in front of you and pull your toes back toward your shin, tuck your chin down toward your chest. Then reverse it exactly: as you lower the leg back down and let the foot relax, lift your chin and look up slightly. That opposition is the whole trick. Straightening the knee pulls the nerve from below, and a chin tuck would pull it from above, so you deliberately do the opposite at the top end. Each full cycle takes two to three seconds. Ten to fifteen cycles per leg.
If you’ve got balance concerns, this is one of the better exercises to own, since it’s done entirely seated and pairs naturally with a broader seated routine.
Supine sciatic slider. Lie on your back with both knees bent, feet flat. Bring one knee toward your chest and hold behind the thigh with both hands. From there, straighten the knee toward the ceiling as far as it goes comfortably while letting the ankle relax and point away. Then bend the knee back down while pulling the toes toward your shin. Same principle — one end loading as the other releases. Ten to fifteen cycles, and go slower than feels necessary.
Tibial slider, for foot and sole symptoms. Seated, cross the ankle of the affected side over the opposite knee. Hold the foot with one hand. Slowly bring the toes and forefoot upward and outward, then release. Small movement, small range, twelve cycles. The tibial nerve passes behind the inner ankle bone in a tunnel of its own, and this one occasionally helps sole burning that’s resisted everything else.
The Upper Limb Sequence
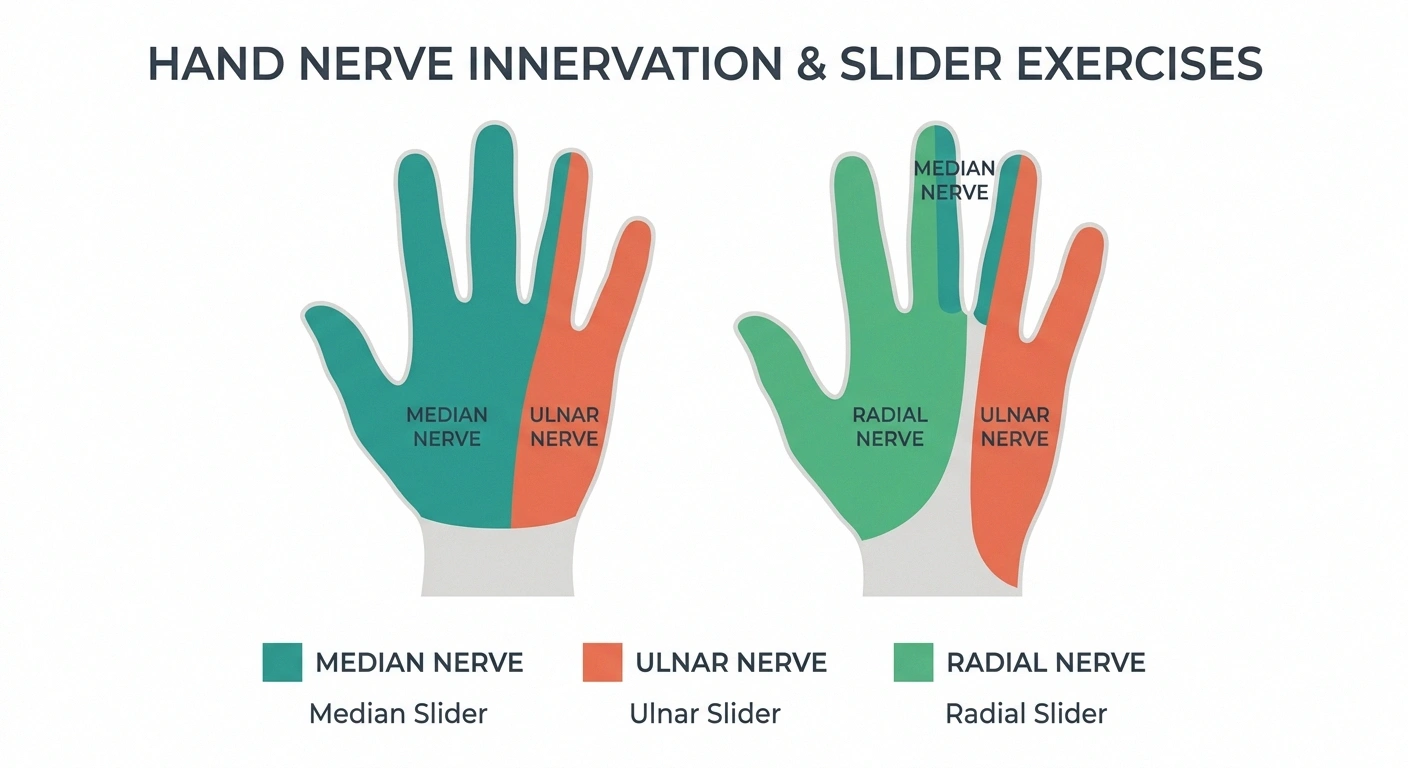
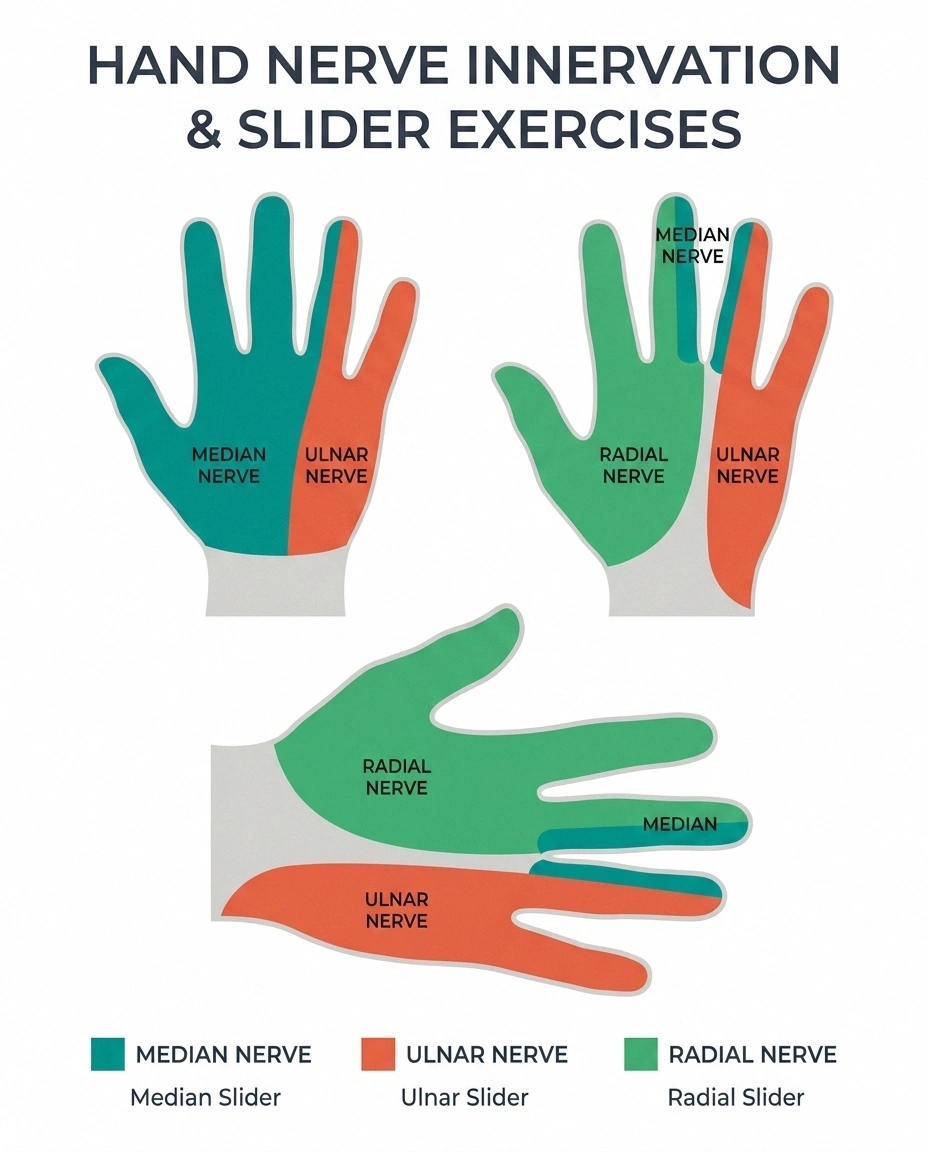
Three nerves run the length of your arm and each has its own signature territory. Symptoms in the thumb, index and middle fingers point at the median nerve. The little finger and half the ring finger belong to the ulnar. The back of the hand and forearm are radial territory. Matching the glide to your pattern matters, and if you aren’t sure which pattern is yours, the mapping in the neuropathy in hands guide is a reasonable place to sort it out.
Doing all six wastes effort and adds volume the nerve has to absorb. Match the glide to where your symptoms actually sit.
- Thumb, index, middle finger
- Median slider
- Little finger and half the ring finger
- Ulnar slider
- Back of the hand and forearm
- Radial slider
- Buttock, back of thigh, calf
- Seated or supine sciatic slider
- Sole of the foot, behind the inner ankle
- Tibial slider
- Both feet equally, no positional change
- No glide is well matched to this pattern. Try the seated sciatic slider if you want to test it, and judge at six weeks.
Median slider. Stand or sit with the arm out to the side at roughly shoulder height, elbow bent, palm facing forward like you are signalling stop. Now: as you straighten the elbow and extend the wrist back, tilt your head toward that same shoulder. Then as you bend the elbow and let the wrist curl, tilt your head away. The head tilt is the release valve — it’s what keeps this a slider instead of a tensioner. Ten cycles, slow.
Ulnar slider. Start with your hand near your face, fingers and thumb forming a circle held against your cheek with the palm facing you, elbow pointing out to the side and down. Slowly rotate the elbow upward and outward so the circle of fingers slides toward your ear and the forearm turns, then return. People describe this one as feeling strange around the inner elbow even when it’s being done correctly. Eight to ten cycles.
Radial slider. Arm at your side, slightly behind you, palm turned backward. Curl the wrist and fingers down and in while tilting your head toward that shoulder, then release the wrist while tilting the head away. Ten cycles. The radial nerve is the one most likely to complain loudly if you rush.
Dosing, and the Stop Rule
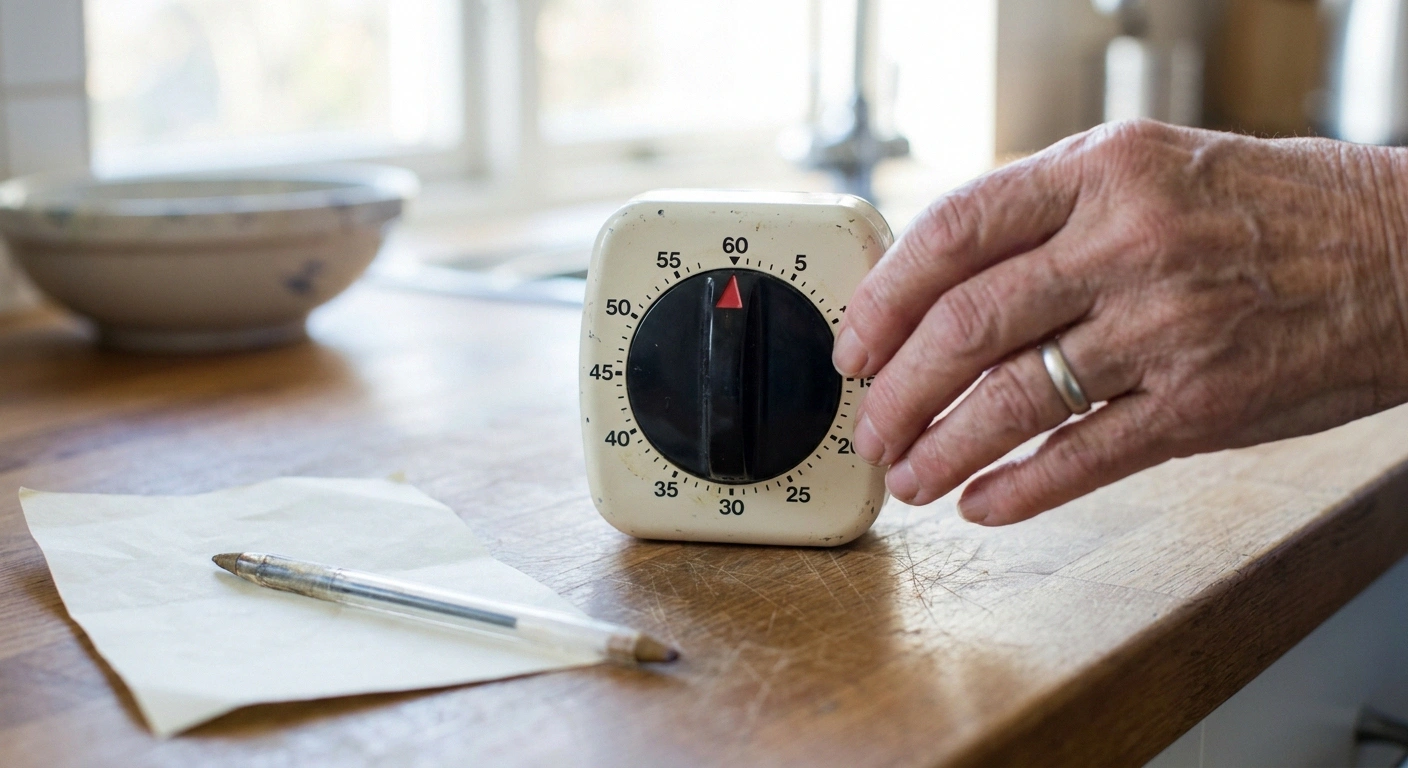
Frequency across clinical handouts converges on the same shape: two to three sessions a day, ten to fifteen repetitions each, every movement taking two to three seconds. That’s under three minutes of actual work per session, which is why this fits into a day when almost nothing else does.
How long symptoms last after you stop is the dosing signal. Intensity during the movement tells you very little.
Now the rule that keeps it safe. Symptoms during a glide should be mild, and they should settle within a few minutes of stopping. A brief tingle mid-movement is expected and fine. Anything that lingers past twenty or thirty minutes means you went too far into range or moved too fast. Anything still there the next morning means the last session was a clear overdose — and the correction is to halve the range and halve the repetitions, not to skip a day and then repeat the same dose. If a reduced dose still leaves next-morning symptoms after a week, or if symptoms climb session over session, stop the glides and get the limb looked at. Repeated downward adjustment is the right response once; it is the wrong response three times in a row.
Speed is where most people go wrong. Quick movements irritate nerves, full stop. If a cycle takes you less than two seconds, you’re not gliding, you’re snapping.
Never push into sharp pain, never hold at end range, and never do these on a limb with new weakness that hasn’t been evaluated.
What Progress Actually Looks Like
Some people notice a change after a single set — a hand that feels less thick, a little more room in the hip. That immediate response is real, it’s documented, and it’s also not the same thing as improvement. It’s the nerve enjoying a few millimeters of travel it hadn’t had that morning, and it fades.
Same day each week, same time of day. Day-to-day symptom noise is large enough to hide a real trend completely, which is why most people abandon this at week three believing nothing changed.
The second column matters more than the first. Function changes before pain scores do, and a note like “carried both grocery bags” is harder to argue with than a number.
Durable change runs on a six-week clock. That figure shows up repeatedly in the clinical literature and it matches what people report — meaningful reduction in baseline symptoms takes about six weeks of consistent daily practice, not two.
A reasonable way to track it, since day-to-day symptom noise will otherwise hide a slow trend: once a week, same time of day, write down one number for symptom intensity and one note about what you could do that day. Six weekly data points will show you a direction that six weeks of daily impressions never will. Memory is a terrible instrument for slow change.
Set the expectation correctly. Gliding is a small, cheap, low-risk intervention that addresses one specific mechanism. It belongs alongside walking, strength work and balance training rather than instead of them, and the full exercise picture is where the larger gains live. Walking in particular does things for nerve health that no amount of gliding replicates.
Mistakes That Turn a Good Technique Sour

Treating it as a stretch. Holding at end range for thirty seconds is the single most common error, and it converts a gentle mobilization into exactly the sustained tension you’re trying to avoid. Move continuously. Never park.
Chasing the tingle. Some people find the position that reproduces their symptoms most vividly and camp there, on the theory that the sensation means it’s working. It doesn’t. The sensation means the nerve is under tension, and you should back off until it’s barely there.
Doing all six glides. Pick the one or two that match your symptom territory. A radial glide does nothing for sole burning, and tossing it in just adds volume the nerve has to absorb.
Skipping the balance question. Standing glides on a limb with reduced position sense are a fall waiting to happen. If proprioception loss is part of your picture, do every one of these seated or lying down. There’s no version of this technique that requires standing.
Going it alone when the pattern is unclear. A physical therapist can test which nerve is restricted in about ten minutes, using positional tests that are genuinely hard to self-administer accurately. If your symptoms don’t map cleanly onto one territory, that assessment is worth more than any generic sequence, and the physical therapy overview covers what such a visit involves.
Frequently Asked Questions
Is nerve flossing the same as stretching?
No, and the difference is the whole point. A stretch takes tissue to its end range and holds it there. A nerve glide moves a nerve back and forth through its pathway while deliberately avoiding sustained tension, by loading one end while unloading the other. Holding a nerve glide at end range converts it into exactly the sustained tension the technique exists to avoid.
Can nerve gliding make neuropathy worse?
It can produce a temporary flare if done too fast, held too long, or taken too far into range. That flare typically settles within a day once the dose comes down. At the small ranges described here a flare is usually a dosing signal rather than an injury, but nerve tissue is not indestructible and aggressive or forced gliding can aggravate an already irritated nerve, so treat a flare as information rather than something to push through. New or increasing weakness, numbness that keeps spreading, or symptoms that worsen across several sessions are reasons to stop and get assessed rather than to keep adjusting the exercise.
How many times a day should I do nerve glides?
Two to three short sessions daily, ten to fifteen repetitions per session, each repetition taking two to three seconds. Total working time is under three minutes per session. More isn’t better with nerve tissue, and doubling the volume is a reliable way to produce a flare rather than a faster result.
How long until I know whether nerve gliding is working?
Give it six weeks of consistent daily practice before judging. Some people notice a small immediate change after one set, but that’s a temporary effect and not a predictor. Durable improvement in baseline symptoms runs on a six-week timeline in the clinical literature.
Will nerve gliding help diabetic neuropathy?
Not the diabetic nerve damage itself. There is no strong trial evidence that gliding reverses length-dependent polyneuropathy from any metabolic cause. It may help a compressed segment layered on top of that damage, which is common in diabetes, particularly at the wrist and elbow. If a portion of your symptoms comes from compression, gliding can address that portion, and nothing more.
Should I feel tingling during a nerve glide?
Mild, brief tingling during the movement is expected. It should fade within a few minutes of stopping. Tingling that persists for half an hour means the range was too large, and tingling still present the next morning means the session was too much overall.
Can I do nerve glides if I have had nerve surgery?
Post-surgical scarring is one of the situations where gliding is most often recommended, since scar tissue is a mechanical restriction and that’s exactly what the technique addresses. Timing matters a great deal, though, and the surgical team sets it. Ask them when to begin rather than starting on your own timeline.
Which glide should I pick if my symptoms are in my whole foot?
Whole-foot symptoms with no positional component are the classic length-dependent pattern, and that’s the pattern gliding is least likely to help. If you want to try anyway, the seated sciatic slider and the tibial slider are the two worth testing. Give them the full six weeks before you decide — but run that trial alongside a proper workup rather than instead of one. Symmetrical whole-foot symptoms are the pattern most likely to have a cause worth finding, and a six-week experiment is not a reason to postpone looking for it.
About the Author